[Projects] Gray 1879 Cuirass Bodice
Oct. 11th, 2007 01:10 pm1879 Cuirass Bodice, from Truly Victorian Pattern TV420. Made using cheap but absolutely beautiful gray synthetic fabric.
So, the bodice is basically finished, except for fasteners which I'm planning on doing tomorrow, and trim which will have to wait for another time. This synthetic fabric (sorry to all the historical purists!) rocks my world. I don't know anything about 19th century textiles aside from the fact that there were very few man-made fabrics, so I'm not sure how accurate it is for at the very least texture but it sure goes together like a dream and looks really, really nice when it's finished. Also, it was $1 per yard, and it is machine washable.
Over all, the pattern was pretty straight forward. I'd say it's not for a raw beginner as the directions were clear but not detailed. It was easy enough for me, for the most part, simply because I kind of had an idea how all the pieces should fit.
Step 1: Laying out and cutting the patterns. Well, ok, step one is tracing the pattern, and then cutting it out. The pink fabric I'm using for flat-lining and it's 100% cotton. Yes, there is a huge Good Luck Bear on the bed in my hobby room. And my flat surface is a printer box. High tech!

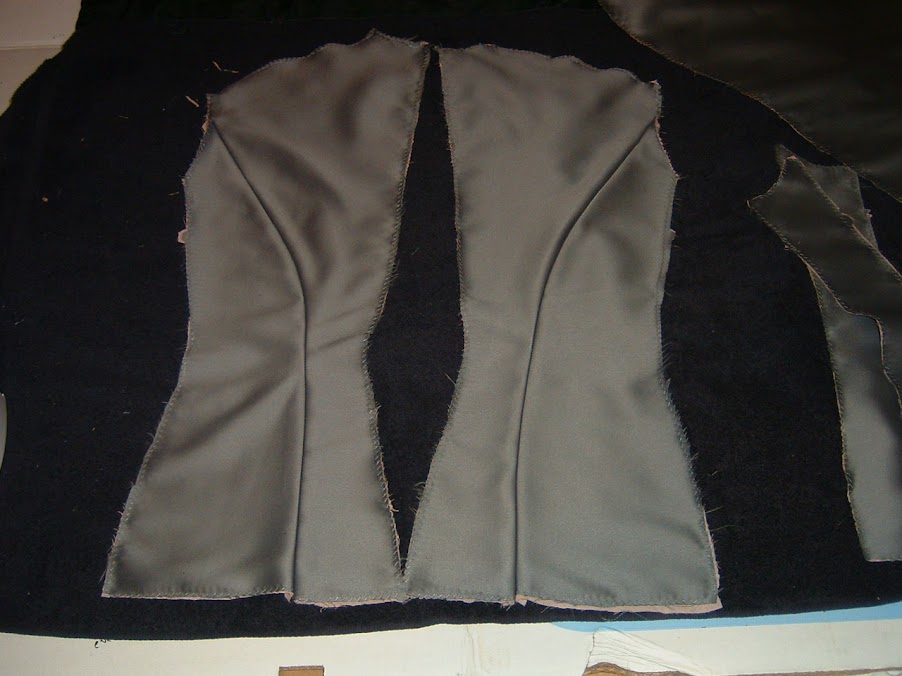
Step 2: All the pieces have been flat-lined!

Step 3: Back pieces have been attached to side-backs:
Step 4: Side-backs have been attached to sides:

Step 5: Sides have been attached to the fronts:

Step 6: And now the back pieces have been attached to each other:

Step 7 (not shown): I attached the fronts to the backs at the shoulders.
Step 8: I machine sewed the collar to the neck, and then hand-sewed the inside so I wouldn't have a double seam showing on the exterior:

Step 9: (not shown) Sewed top sleeves to bottom sleeves, so then I had two tubes that vaguely resembled sleeves.
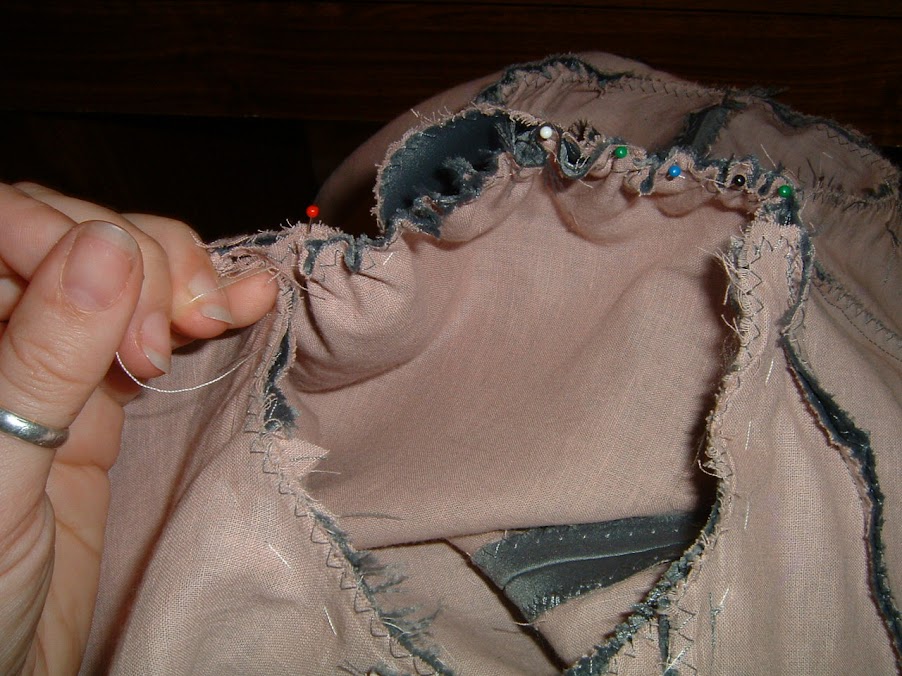
Step 10: Pinning the sleeves in the arm holes:

Step 11: Gathering the sleeves so they'll fit in the arm holes!
Steps (not shown): Matt and I made some bias tape out of the gray fabric to use on the front. This was a nightmare, and definitely where the wonder-fabric did not behave so wonderfully. It absolutely did not want to participate in being ironed into bias tape. In the end, we prevailed, but I'm thinking, uh, NEVER again!
Also not shown are the sleeves and bottom getting hemmed.
And the mostly-finished 1879 Cuirass Bodice with 3/4 sleeves! Also modeling the killer bunny from Monty Python's Quest for the Holy Grail, gaming books, and sundry other items of interest to no one except me:

There you have it!
For the SASS event on Saturday, I'm going to add lace to the sleeve cuffs and collar. I think later I'll do pleated contrasting fabric in the sleeves instead, but I haven't decided. And actually, given the difficulty of getting the bias tape ironed, maybe pleats aren't the way to go.... Hm. My wonder-fabric is showing some flaws.... Straight stuff, no problem. Drapey stuff, no problem. Pleats? Problem. Ah, well. I'll figure something out! Maybe a straight border thingy of the contrasting fabric and keep the lace....
I'll make Matt take pictures of me at the event dinner where I'll be wearing my super spiffy new outfit. ^_^
I've also almost completed the TV Fantail skirt out of the same gray/silver fabric. I haven't done any progress pictures of it simply because it is going together so quickly. Sweet! It went together in two (yes, count them, two) evenings. One of my friends, Nina, came over to visit and such and offered to help, so she helped me by tracing out the pattern, which also definitely saved me some time! (Plus tracing and cutting are my least favorite things to do, so she doubly rocks!)
I only need to add the fasteners and finish the hem on the back part of the skirt, as I've already hemmed the front and sides. I've already tried the whole ensemble on in its semi-complete state, and pranced around my living room admiring myself in the mirror that covers the whole west wall of the room.
I promise on the next Fantail skirt I will do better with photos, because there will certainly be a next time on this skirt. It is just that beautiful, and that simple to do.
Cross-posted to![[livejournal.com profile]](https://www.dreamwidth.org/img/external/lj-community.gif) dfwcg
dfwcg
So, the bodice is basically finished, except for fasteners which I'm planning on doing tomorrow, and trim which will have to wait for another time. This synthetic fabric (sorry to all the historical purists!) rocks my world. I don't know anything about 19th century textiles aside from the fact that there were very few man-made fabrics, so I'm not sure how accurate it is for at the very least texture but it sure goes together like a dream and looks really, really nice when it's finished. Also, it was $1 per yard, and it is machine washable.
Over all, the pattern was pretty straight forward. I'd say it's not for a raw beginner as the directions were clear but not detailed. It was easy enough for me, for the most part, simply because I kind of had an idea how all the pieces should fit.
Step 1: Laying out and cutting the patterns. Well, ok, step one is tracing the pattern, and then cutting it out. The pink fabric I'm using for flat-lining and it's 100% cotton. Yes, there is a huge Good Luck Bear on the bed in my hobby room. And my flat surface is a printer box. High tech!
Step 2: All the pieces have been flat-lined!
Step 3: Back pieces have been attached to side-backs:
Step 4: Side-backs have been attached to sides:
Step 5: Sides have been attached to the fronts:
Step 6: And now the back pieces have been attached to each other:
Step 7 (not shown): I attached the fronts to the backs at the shoulders.
Step 8: I machine sewed the collar to the neck, and then hand-sewed the inside so I wouldn't have a double seam showing on the exterior:
Step 9: (not shown) Sewed top sleeves to bottom sleeves, so then I had two tubes that vaguely resembled sleeves.
Step 10: Pinning the sleeves in the arm holes:
Step 11: Gathering the sleeves so they'll fit in the arm holes!
Steps (not shown): Matt and I made some bias tape out of the gray fabric to use on the front. This was a nightmare, and definitely where the wonder-fabric did not behave so wonderfully. It absolutely did not want to participate in being ironed into bias tape. In the end, we prevailed, but I'm thinking, uh, NEVER again!
Also not shown are the sleeves and bottom getting hemmed.
And the mostly-finished 1879 Cuirass Bodice with 3/4 sleeves! Also modeling the killer bunny from Monty Python's Quest for the Holy Grail, gaming books, and sundry other items of interest to no one except me:
There you have it!
For the SASS event on Saturday, I'm going to add lace to the sleeve cuffs and collar. I think later I'll do pleated contrasting fabric in the sleeves instead, but I haven't decided. And actually, given the difficulty of getting the bias tape ironed, maybe pleats aren't the way to go.... Hm. My wonder-fabric is showing some flaws.... Straight stuff, no problem. Drapey stuff, no problem. Pleats? Problem. Ah, well. I'll figure something out! Maybe a straight border thingy of the contrasting fabric and keep the lace....
I'll make Matt take pictures of me at the event dinner where I'll be wearing my super spiffy new outfit. ^_^
I've also almost completed the TV Fantail skirt out of the same gray/silver fabric. I haven't done any progress pictures of it simply because it is going together so quickly. Sweet! It went together in two (yes, count them, two) evenings. One of my friends, Nina, came over to visit and such and offered to help, so she helped me by tracing out the pattern, which also definitely saved me some time! (Plus tracing and cutting are my least favorite things to do, so she doubly rocks!)
I only need to add the fasteners and finish the hem on the back part of the skirt, as I've already hemmed the front and sides. I've already tried the whole ensemble on in its semi-complete state, and pranced around my living room admiring myself in the mirror that covers the whole west wall of the room.
I promise on the next Fantail skirt I will do better with photos, because there will certainly be a next time on this skirt. It is just that beautiful, and that simple to do.
Cross-posted to